BACKGROUND INFORMATION
This deck was created to center around the theme of big troops and small spells. Your giant and balloon will be your main damage dealer, and sometimes your giant skeleton will reach your enemy’s crown tower to drop his payload. Most of the time you will use his death bomb on defense to stop a big push your enemy is trying to create. His big splash damage makes him fairly good on defense. Your dart goblin and spells will be mostly used for defense as they are your cheaper troops and will allow you to cycle through your cards quickly.
BASICS: AVERAGE ELIXIR AND HOW TO USE EACH TROOP EFFICIENTLY
The average elixir cost for this deck is 4.1 elixir and the following cards used are:
TROOPS: USED FOR DEFENSE AND OFFENSE. IMPORTANT TO USE THE RIGHT COUNTER FOR EACH TROOP
 Giant Skeleton- The giant skeleton is your main tank of your push. The giant skeleton leads your balloon towards the tower getting shot at by enemy troops. Ideally, your balloon makes it to the tower unharmed and drops their bombs. Usually, this is not the case. Most players usually bring at least one building into their deck, whether its the cannon, inferno tower, or elixir collector, they will all distract both your giant skeleton and your balloon. Because of this, your giant skeleton loses its ultimate tank status and switches to more of a guard that tries getting its payload, the balloons bomb, to the tower. Of course you want your giant skeleton to soak up all the damage of the enemy troops, but this will most likely not happen. The giant skeleton is not suppose to make it to the tower but is a great bonus if it does. Its death bomb does about 1000 damage to the crown tower which is more damage then what a single bomb from your balloon would do. However, if it happens to die before it makes it to the enemy tower, that is completely fine. Instead of just dying like the regular giant wood, the giant skeleton grops a big bomb. This can help clear out the enemy’s defending troops or buildings which can make it a lot easier to have your balloon reach the enemy crown or arena tower. However, the timer on the explosive bomb is three seconds so if the enemy defends with a minion horde or minions, it is most likely that it will be to late for your balloon once the bomb goes off. You giant skeleton is there just so it takes enough damage for your balloon to get one shot off on the tower. Two shots are unlikely but is possible. Because the balloon’s initial bomb damage and its death bomb does about 800 damage combined, you can afford to only get one shot off each push. Use your giant skeleton and balloon effectively, and you will get towers down in no time.
 Giant- The giant will be one of your biggest tanks health wise but is not your biggest damage dealer. Costing at five elixir, you want to start off every major push will your giant in the back of your map. This will allow you to regenerate some of your elixir that you spent letting you build up a more expensive and bigger push to defend against. Once you get another four elixir stored up, send your hog rider behind your giant. Make sure though that the hog rider is not directly behind the giant. If your enemy does counter the giant with barbarians right when he crosses the river, they will not hit the hog rider. Instead of the barbarians killing the hog quickly, the barbarians will be distracted by the giant. Also, there is the snowball effect where they keep trying to defend but by the time you send out another troop to defend, your next push has already been set or you will have a solid defense with towers building up. Once this starts happening, it is very easy to secure victory because your enemy is elixir deprived and you can just keep sending troops at him. However, your opponent can place an inferno to stop the push fairly well, and that is buy using the inferno tower. I recommend zapping the enemy’s inferno tower when it is on its second stage of damage. This will let the giant survive the longest amount of time and it will not get the highest damage setting until the very end of his life. With that counter down,there is only one more to address. and quite possible the easiest to think of, the minion horde. You can counter this by having your spear goblins, a quick and easy card, support your push behind the royal giant. Along with the help of your fireball, you should be able to easily take down the minion horde without having to much damage be put onto your giant. By knowing and memorizing how to stop your enemy from countering your push, you should be able to drastically improve your win ratio.
 Balloon- Your balloon is your main damage dealer in your deck. If it goes onto the enemy tower, you will see your opponent arena or crown tower’s health bar drop like crazy. A level 3 balloon will do just over 700 damage per bomb dropped. A higher level balloon will do a lot more damage, nearly 100 per bomb, can can kill some of your opponents crown or arena towers with just three shots. However, your balloon is very weak towards minions. Minions have a high damage per second stat which can easily kill the balloon before it reaches to your enemy crown or arena tower. Also, spear goblins are effective against the balloon because they have a fairly high damage per second stat. If the enemy isn’t tactical, the minions will spawn on the giant skeleton. However, if they are tactical, which most of them are since they are in legendary arena, they will wait until the balloon crosses the bridge and then they spawn the minions on top of the balloon. this is both true with the minions and the spear goblins if our opponent has any of those cards. However, having your opponent defend with spear goblins is a lot harder for them because the spear goblins will be more prone to attack your giant skeleton instead of your balloon. Because of this, you may want to be ready to support your balloon with preemptive arrows, which will be explained in the arrows section of this article. The balloon can also be well supported by your ice wizard, but you may want to save it for a defensive counter if your opponent has a high cost deck.
 Wizard- The wizard is your support for your hog rider in this trifecta deck be adding lots of splash damage to enemy ground and air units. The wizard is an overall great card to have in your deck because it is the most effective card that does splash damage to both air and ground troop. Its fast fire rate compliments the giant’s sluggish moves. Additionally, the wizard helps counter what the hhog rider is weak against, small critters. The wizard can one shot many small troops like the skeletons, the spear goblins, the regular goblins, the three elixir minions, and the archers. The wizard can also make quick work of swarms of troops killing the barbarians in three shots, the minion horde also in three shots, and the skeleton army in a few more shots. The wizard however is pretty weak when being attacked. The wizard can be easily killed by an enemy lightning spell or rocket. The wizard can also be killed by a relatively high level fire ball. The wizard is actually pretty good on defense. It can kill oncoming enemy barbarians by itself. It is also the best troop to use when countering the minion horde because your wizard can one shot the minions making quick work of the minion horde. However, the wizard is not so great at countering high health troops like the prince, the pekka, the golem, and the lava hound. The prince and pekka do too much damage to even let the wizard have a chance and the golem and the lava hound have too much hit points for the wizards relatively weak fire balls to do any noticeable damage. However, an extremely well timed wizard can completely kill all the lava pups that spawn from a lava hound with one fire ball. This also is the same with the goblin barrel. An extremely well timed wizard can kill the goblins from the goblin barrel all in one go. The wizard costs five elixir which is one of your higher costing cards. I recommend saving your wizard only for your trifecta push because this is a key troop for it. Only use your wizard for something else if it is the only option from saving your arena or crown tower.
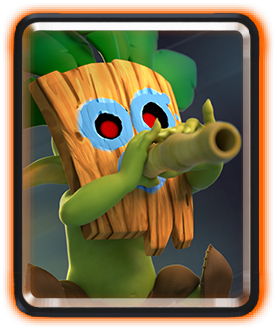 Dart Goblin- The dart goblin card is like the spear goblins but only one of them and it is stronger. For being one of the the three dart goblins, it is surprising how well they perform. The dart Goblins not only can defend against goblins, enemy Spear Goblins, and Minions in a one verse one with the help of your Tower, but it can also be used at the very beginning. If the dart Goblins is used right at the start, you force your opponent to either react to them by placing a much more expensive troop, leaving an option to have a hard counter ready, or make them just watch the dart Goblin chip 200 damage off their tower. 200 may not seem like a whole bunch, but do that 2 or three times in a match, and you got yourself 500 free chip damage. The dart Goblins can also kill a Princess that is on the bridge very quickly as long as the princess is distracted. If the princess is not distracted and you deploy the spear goblins, they will die before they can kill the princess, making you basically waste three elixir. On a very good note however, you can do an advanced move with these spear goblins. The dart goblins are extremely vulnerable to most damage units like the musketeer, the Valkyrie, the prince, the bowler, the fire spirits, and the miner. The spear goblins are also very vulnerable to any direct damage spells such as the fire ball, the arrows, and the lightning spell.
SPELLS: THEIR MAIN USES AND HOW TO MAXIMIZE THEIR POTENTIAL
 Arrows- Preemptive arrows is a term to describe something you do because you anticipate a future event that did not happen yet. An example of a preemptive tactic is when you shoot a fireball in front of your enemy’s arena or crown tower after you placed down your hog rider. You may do this just in hopes to kill their defensive barbarians faster and more effectively. The same strategy applies with the preemptive arrows. Right after both your giant skeleton and balloon crossed the bridge, your opponent may spawn minions or the minion horde. If you see them counter with the minions or the minion horde the very first time you make a big push, you can reasonably assume that they will defend in the same manor as long as they cycle through their cards enough and you have the same push composition. If they have just the three elixir minions, that is o k. If they have the minion horde as a defense, that is even better because you can gain an elixir advantage. What you want to do is have patients and wait until your giant skeleton and your balloon have crossed the river. Right before you think your opponent will place the three elixir minions or the minion horde, send your arrows out at nothing, but send them where you think they will spawn their three elixir minions or their minion horde. This gives you a head start on countering the three elixir minions or the minion horde and let both your giant skeleton and your balloon go unscathed in the push. However, there is a risk in doing this. If they send in the minion horde to their three elixir minions just a bit later than you think, you have wasted your arrows and now have to defend against the minion horde or the three elixir minions. Also, if they defend with something else, you could also waste your arrows. If they place down an inferno tower and you send out your arrows, you have just wasted them and gave your enemy a perfectly good time to use their minions for an offensive push while you do not have your main counter. Usually I do not do preemptive spells unless the situation is dire or they are very predictable. Arrows are also your main princess killer. Keep in mind that you need at least level 8 arrows or you should switch this card for fire spirits. The reason is that to kill a level 1 princess, you need at least a level 8 arrow card. Level 2 princesses will take level 9 arrows and so on and so forth. Also, you can use this card to kill minion hordes for a big profit and goblin barrels for a one elixir profit. Arrows can also help you kill small swarms like skeletons, minions, goblins, spear goblins, or the skeleton army. The arrows, if timed well, can also effectively counter an enemy goblin babrrel for an equal elixir trade. You also will not take any damage from the barrel because a recent update mitigated the splash damage the barrel cause to zero. Arrows is a very good card to have in your deck because it is only 3 elixir and can counter many things for an elixir advantage of some sort.
 Log– The log is here because your opponent would not be expecting you to play this card. The reason why your log is here and not your arrows or your fire ball is for a few reasons. The log does quite a bit more damage when compared to your arrows. In exchange for this damage, though, you cannot target enemy air troops with the log card. In this deck,I think the log is a better choice than the arrows because you already have the furnace and the zap spell. Both of those cards combined should let you kill any swarm air troops like the minion horde or the regular three elixir minions. Also, the log is better than the fire ball in this deck because it is cheaper than the fire ball. The once elixir difference can be the difference in having enough elixir to defend an enemy counter push and to have one of your crown or arena towers completely wiped out. The log also can hit your enemy towers which can help you finish them off if they have low health. Also, just like the fire ball, the log can help support your hog rider in your main push. If you put the log right behind your hog rider, you will be able to use the log to push away and damage any defending barbarians. This push back is similar to the knock back the fire ball does to any defending enemy barbarians. The log will also sort of clear the way for your hog rider to get to the enemy arena or crown tower very easily. The log can also be used fairly well for defensive purposes. If the enemy is bring a strong push to your arena or crown tower, you can send in your log to not only damage the oncoming troops, but to also push them back and away from your arena or crown tower. This push back can help you stall for another second which can really change the tide of the battle. With that one second stall your log provides you, you may be able to reduce the damage done to your tower by hundreds of hit points. I think for three elixir, the log is a pretty good card that can help you in some situations. I see the log more of a utility card than a damage card but it still can easily counter hut spam decks. The log card is great in some decks while lacking in others. The trick is to find the deck that works well with the log and you can have the element of surprise held against your enemy.
 Fireball- The fireball is an important card in your deck. In a desperate situation, you can destroy barbarians or a minion horde very quickly. Since the ice wizard can do this job for a better elixir value, you should only use the fireball on those troops if you need them dead in an instant, i.e. they are right next to your tower. Also, if you have level nine arrows and your opponent has a level three or four princess, your arrows won’t take her out. If this situation happens to you, your fireball will always to the job. The fireball is also the best option to take out the triple musketeers. Combined with arrows, this combo can completely destroy high level triple musketeers. Also, because of the May 3rd update, making the elixir collector lose 20% health, and the May 18th update, causing the elixir collector to lose 9% more health, the fireball can now actually counter the elixir collector very well. You can basically may an even trade elixir wise and do a medium amount of chip damage to the tower. A good combo in addition to the elixir collector and tower is that if you hit other troops with that same fireball, you will come out ahead in terms of elixir.
TOWERS: HOW TO USE THEM AND WHERE TO PLACE THEM
No Towers Are Used In This Deck.