Background Information
This is another one of my personal decks. Currently, I think this is my best trophy pushing deck but is hard to use. This deck can be hard to master and definitely can create huge losing streaks. Because of the potential to lose a lot in a row, it may not be for you. This deck is very cheap so you can always be on the offensive and to always send out the hog. The premise of this deck is to make the opponent to use all their hog counters and eventually get that hog to the tower. Some upsides to this deck is that it is very fun to play with. I personally have way more fun to stick with offense than to sit back and do some spell damage. Additionally, the Crown Chest will go by much quicker. This deck has the potential to get two or three stars per attack if you win. In addition, even if you lose it is still pretty easy to get one Tower down. The average time for me to collect a Crown Chest is less than an hour, which can easily be split up in sections throughout the day. Also, by using an offensive deck over a defensive one, you are more likely to experience the taunts used as a friendly manner towards yourself as this strategy isn’t as hated as other deck combinations.
Basics: Average Elixir And How To Use Each Troop Efficiently
The average Elixir cost for this deck is 3.8 and contains the following cards:
Troops: used for defense and offense. Important to use the right counter for each troop.
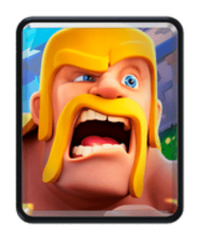
 Barbarians– This card costs 5 Elixir. This is best used to counter Princes, P.E.K.K.A, and the Hog Rider. They are also an extremely helpful distraction for smaller troops that can do major damage if left untouched, like the Minions, Spear Goblins and the Goblin combo. The Barbarians can also help defend against the Dark Prince if the situation is desperate, but is not recommended counter since the Dark Prince is a pretty good Barbarian destroyer. If the Barbarians are set on top of the much feared Sparky, they can easily destroy it, and you will gain a major Elixir advantage. These four mighty men are also your biggest tanks. If you do want to launch a major offensive push, it is best to use them as the meat shield, or tanks of your push. If they do get to the tower unnoticed they can easily destroy it. In my opinion, the Barbarians are one of the biggest staple cards in the game.
 Minions– This deck uses the Minions instead of the Minion Horde. The Minions are preferred in this deck over the Minion Horde because you want to keep the cost of troops low. By keeping the cost low, you will be able to cycle through your cards faster. The Minions also do well enough against air troops like the Balloon or Baby Dragon, although for the Baby Dragon needs to target your Crown Tower first. Minions also can take out the Barbarians with the help of the Spear Goblins. This leaves you with a major counter push at the ready. Also, these blue little monsters can help destroy Prince rushes with the help of some ground troops. Even if your enemy uses Arrows, you are not at a Elixir disadvantage, unlike the Minion Horde. The Minions could also kill a Sparky before it can take its aim at the Tower. The Minions can also kill a Princess that is on the bridge. Like the Barbarians, I believe the Minions are a staple card if the Minion Horde is not being used. The Barbarians, along with most swarm grown troops, can be used to pig push the Hog. Pig pushing will be explained in the hog section of this article.
Spear Goblins– One of the most basic troops in the game. For its early unlock at Arena 1, it is surprising how well they perform. The Spear Goblins not only can defend against goblins, enemy Spear Goblins, and Minions in a on verse one with the help of your Tower, but it can also be used at the very beginning. If the Spear Goblins are used right at the start, you force your opponent to either react to them by placing a much more expensive troop, leaving an option to have a hard counter ready, or make them just watch those Spear Goblins chip 300 damage off their tower. 300 may not seem like a whole bunch, but do that 2 or three times in a match, and you got yourself 1000 free chip damage. The Spear Goblins can also kill a Princess that is on the bridge very quickly. The Spear Goblins, along with most swarm grown troops, can be used to pig push the Hog. Pig pushing will be explained in the hog section of this article.
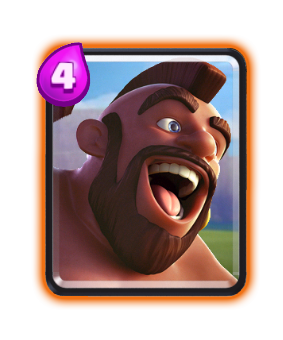
 Hog Rider– This is the heart and soul of the deck. This will be the troop that will do the most damage to the Tower and it will also be your main offensive unit. Because of the Hog Rider’s decent health stats and its
  great damage per shot, it is a great unit to attack with. Additionally, it only targets defensive buildings which make it that much easier to control. There are some standard moves in playing the Hog efficiently. The moves that till be gone over in this article is the Elixir pump rush and pig pushing. If you are above or at arena 6, there is no doubt that you see a lot of Elixir Collectors about. Normal players want to protect their Elixir collector and put it in the back of their map. If it starts in their starting hand, that is going to be played first 90% of the time. If they do place it in the back, take advantage of the 5Eelixir they just used. Try to make a Hog push in the combos of Hog and Spear Goblins, Hog and Minions, or Hog and Barbarians. If you don’t have the Hog in your starting hand, make a small push maybe of just Spear Goblins and see how they react. This move has given me so many wins since I found out that this worked. The Tower will fall if nothing happens to that push. Usually, they send in a panic Fireball and you still get about half their Tower. The second strategy is called pig pushing. It can be hard to master for some so it is recommended to practice with your friends. The basic concept of this is to nudge the Hog a little bit to the outside by spawning troops right next to the hog. The picture to the left shows how to pig push pretty well. It also shows the counter to the pig push in case you run into anyone also using this tactic. The counter to this is pretty ineffective since the movements happen so fast. There is barely any time to react to this strategy. If you do pig push, make sure your are on the side where the defense is further away from your chosen spawn location. Failure to recognize which side is the one to do it on can result in an ineffective and useless push.
Towers: How to use them and where to place them
 Inferno Tower– This is what you would consider the surprise card in this deck. You should wait until it is absolutely necessary to play this card because if you play it right off the bat, they can destroy it and push hard with high health point tanks. This would result in an immediate loss of a Tower. If they push with a P.E.K.K.A or Golem, you should wait until it is at the bridge and then place down the Inferno, giving them little time to respond to it. This can help counter against Hogs but will leave you with a one Elixir disadvantage. I usually have my Fireball ready as most P.E.K.K.A or Golem users like to distract the Inferno Tower with a Minion Horde. If the Inferno Tower does fall, Barbarians or the Minion Horde can finish up the Golem or the P.E.K.K.A . Like any building after the May Third update, you should be weary if the opponent has a Royal Giant as it can out range most defensive buildings.
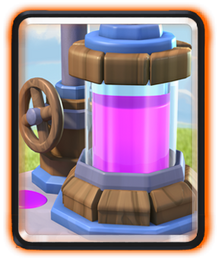
 Elixir Collector– The Elixir Collector is a very special card. Most people don’t see its full potential. At first glance, most people just think it just gives you two additional Elixir. While this is true, there is a hidden, more important use for it. The Elixir Collector allows you to build up an even bigger push faster than without one. This lets you out-Elixir your opponent during your assault. Since it is such a valuable card, instincts tell you to put it at the back of you base, where it can’t be touched. This is wrong ans a Hog user can immediately rush you and destroy the Tower. Instead, put it between your Crown Towers, two to four squares in front of your king’s castle. This will make hog pushers think twice before making the attack. If they do launch one, be ready to deploy your Minions or Spear Goblins to help take down the Hog. The Elixir Collector is not mandatory to the process of beating your opponent but if played, it will make it a whole lot easier.
Spells: Their main uses and how to maximize their potential.
 Fireball– The Fireball in this deck is not to constantly barrage the Crown Towers but to take down mass swarms for Elixir profit. Combined with the Zap spell, it can take down the Three Musketeers and let you gain an easy 3 Elixir. The main troops this card counters is the Minion Horde and the Barbarians. Striking a lone Minion Horde will give a one plus trade. The Barbarians will also give the one positive Elixir trade. The Fireball can also be used against the Princess if you can hit the Crown Tower also or if other troops can also be hit. It is not recommended to shoot a Fireball if it only hits the Princess as it will put you behind in Elixir. The Fireball can finish off a Tower as long as there is only a few seconds left and the Tower is not over 300 health. Combined with a Zap, the Fireball can do almost 300 damage.
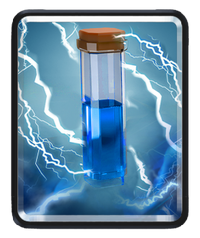
 Zap– The Zap spell is mainly used to support your Hog Rider. A well placed Zap can stun the troops that are suppose to counter the Hog and it would also stun the Tower. A well placed stun will allow your Hog to get about two more shots off which will produce about 500 extra damage. Additionally, the Zap can help counter small troops like Minions, Spear Goblins, Goblins, and even the Minion Horde. The Zap could also stop a Prince from charging which will reduce his damage immensely. The Zap, if high enough Level, can also help counter pesky Goblin Barrels the fly across the map and onto your Tower producing a plus two Elixir advantage. The Zap can also stop an oncoming Hog attack, preventing one to two swings resulting in 500 health points being saved. The Zap is a very versatile card and I only recently found out its potential.